Trailer Work & Wiring
So, part two of the Teardrop Camper Build is all about the base of the trailer, getting it cleaned up, prepped and ready for the framework. The below video steps through most of these items.
We started by cleaning up the wheels first because it was easy and I wanted to try out the Durabak coating product. I purchased some nice black replacement lug nuts with the goal of making the rims look outdoorsy and rugged. By the way, we did learn that a good primer was key to ensuring that the Durabak would stick well.

We then stuffed the bottom of the trailer, between the boards, with foam insulation, and coated the bottom of the trailer with a Flexseal spray. Our goal was to water proof the bottom as much as possible. We also put several coats of clear deck paint on the top boards before we covered it with another 3/4″ solid deck board that was coated with paint. Our intention was to ensure, as much as possible, that rot would not happen on the underneath of the trailer.
You will notice that we were able to get the trailer up on blocks with weight on the back end so that working on the underneath side of the trailer was much easier.
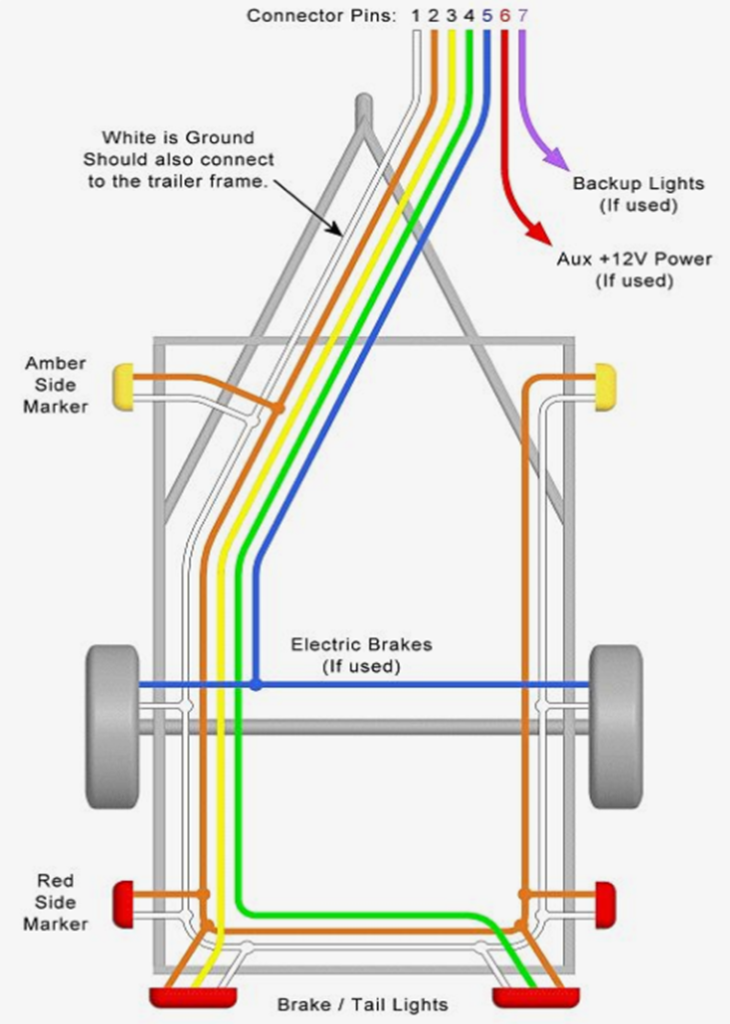
We then started wiring up the trailer lighting. Most of the original lighting was broken and disconnected. So, we removed all of the old wiring to add new wiring and lights. Neither dad nor I are electricians, so we had to do some research on how to properly wire a trailer. The picture below represents pretty closely our arrangement. We did not use connector pins #5, 6, or 7. We did place all of our wiring in blue PVC tubing and secured the tubing with clamps. We then made tee sections where the wiring branches off to each of the individual lights. We put two amber lights in the front, red lights on either side of the two wheel wells, and brake/turn signal lights in the back. You will notice that I mention in the video that one of the brake lights has a license place light. So you will want to make sure you put that light on the correct side.
We finished up the base of the trailer by painting the black bottom section with the Durabak paint, which again give the trailer a tough coating and a rugged look as you can see below.

This finished out cleaning up the trailer and prepping it for what we were about to build on top of it.