5S is a system for organizing spaces so work can be performed efficiently, effectively, and safely. This system focuses on putting everything where it belongs and keeping the workplace clean, which makes it easier for people to do their jobs without wasting time or risking injury. Also see this article on 5S B2.11-5S – Foundational Activity to Improve Safety, Productivity, and Culture
5S Translation
The term 5S comes from five Japanese words:

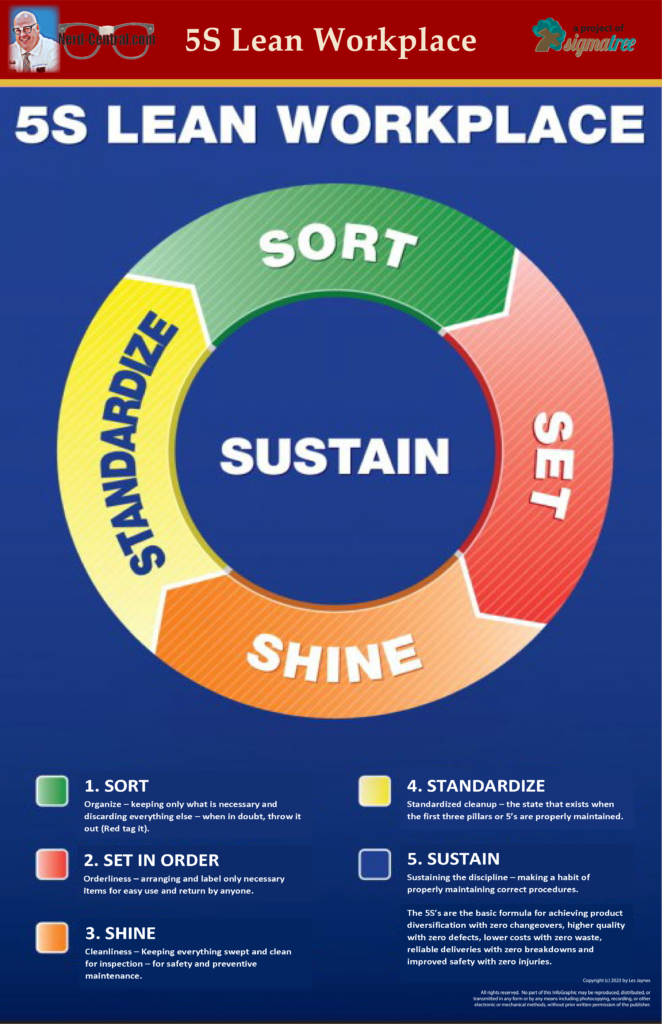
Each S represents one part of a five-step process that can improve the overall function of a business. Below is an infographic that summarizes the concepts of 5S. Click here to see this and other posters
The Origins of 5S
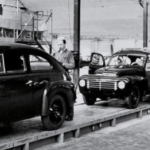
5S began as part of the Toyota Production System (TPS), the manufacturing method begun by leaders at the Toyota Motor Company in the early and mid-20th century. This system, often referred to as Lean manufacturing in the West, aims to increase the value of products or services for customers. This is often accomplished by finding and eliminating waste from production processes.

Lean manufacturing involves the use of many tools such as 5S, kaizen, kanban, jidoka, heijunka, and poka-yoke. 5S is considered a foundational part of the Toyota Production System because until the workplace is in a clean, organized state, achieving consistently good results is difficult. A messy, cluttered space can lead to mistakes, slowdowns in production, and even accidents, all of which interrupt operations and negatively impact a company.
By having a systematically organized facility, a company increases the likelihood that production will occur exactly as it should.
Benefits of 5S
Over time, the 5S methodology leads to many benefits. Here are a few of the key benefits.
- Its use creates space within your facility by removing unnecessary tools and equipment.
- It reduces costs in several ways; not having to look for needed tools and better maintains equipment to name a few.
- Using 5S has the byproduct of producing higher quality products.
- It also Increases productivity by ensuring that everything has a home.
- There is a higher employee satisfaction because of pride in the work environment.
- And it has the extra bonus of creating a safer work environment.
What Are the 5S’s?
The 5S concept might sound a little abstract at this point, but in reality, it’s a very practical, hands-on tool that everyone in the workplace can be a part of.
5S involves assessing everything present in a space, removing what’s unnecessary, organizing things logically, performing housekeeping tasks, and keeping this cycle going. Organize, clean, repeat.
Let’s take a closer look at each of the parts of 5S.
Sort

The first step of 5S, Sort, involves going through all the tools, furniture, materials, equipment, etc. in a work area to determine what needs to be present and what can be removed. Some questions to ask during this phase include:
- What is the purpose of this item?
- When was this item last used?
- How frequently is it used?
- Who uses it?
- Does it need to be here?
These questions help determine the value of each item. A workspace might be better off without unnecessary items or items used infrequently. These things can get in the way or take up space.
Keep in mind the best people to assess the items in space are the people who work in that space. They are the ones who can answer the above questions.
When a group has determined that some items aren’t necessary, consider the following options:
- Give the items to a different department
- Recycle/throw away/sell the items
- Put items into storage
For cases when an item’s value is uncertain — for example, a tool hasn’t been used recently, but someone thinks it might be needed in the future — use the red tag method. Red tags are usually cardboard tags or stickers that can be attached to the items in question. Users fill out the information about the item such as:
- Location
- Description
- Name of person applying the tag
- Date of application
Then the item is placed in a “red tag area” with other questionable items. If after a designated amount of time (perhaps a month or two) the item hasn’t been used, it’s time to remove it from the workspace. It’s not worth hanging onto things that never get used since they just take up space.
To implement the Sort process, separate necessary items (e.g., tools, parts, and materials) from unnecessary items. We recommend sorting items into four categories:
- Items needed in this work area. These are items you know that you regularly use in the context of this work area and thus will stay in this work area.
- Items needed in another work area. These are typically misplaced items. If an item is used in another work area, “sort” it into that area by delivering it to the team member responsible for that work area.
- Items you may need. For items you are unsure about, use the 5S “red tag” system. Mark such items with red tags, which at a minimum, should include the name of who tagged the item, why it is thought to no longer be needed, a proposed review date, and the name of the manager who must approve of disposal. Move the item to a red tag holding area, which should be organized by review month to make it easy to manage the area.
- Items you do not need. These are items that you are 100% confident are not needed. They should be immediately discarded, recycled, or donated, or sold if in good condition.
Tip: Set a reminder—on your phone or computer or posted somewhere in the workspace—to check back in with the red tag area so it doesn’t get forgotten.
Set in Order

Once the extra clutter is gone, it’s easier to see what’s what. Now work groups can come up with their strategies for sorting through the remaining items. Things to consider:
- Which people (or workstations) use which items?
- When are items used?
- Which items are used most frequently?
- Should items be grouped by type?
- Where would it be most logical to place items?
- Would some placements be more ergonomic for workers than others?
- Would some placements cut down on unnecessary motion?
- Are more storage containers necessary to keep things organized?
During this phase, everyone should determine what arrangements are most logical. That will require thinking through tasks, the frequency of those tasks, the paths people take through the space, etc.
Businesses may want to stop and think about the relationship between the organization and larger Lean efforts. What arrangement will cause the least amount of waste?
In Lean manufacturing, waste can take the form of:
- Defects
- Waiting time
- Extra motion
- Excess inventory
- Overproduction
- Extra processing
- Unnecessary transportation
- Unutilized talents
Tip: For 5S, specifically consider how the layout and organization of an area could increase/decrease waiting time, motion, and unnecessary transportation.
After you’ve sorted items, it’s time to decide how you want to organize them. We recommend the following methodology:
- Provide easy access to frequently used items. The key to reducing waste from excess motion is to place frequently used items within easy reach.
- Group like items. Group the remaining items into logical categories and brainstorm the best way to organize and store each of these categories.
- Utilize visual designs. For each group, decide on the best way to make it clear when an item is missing or misplaced. A classic example is creating a shadow board for tools.
- Use containers. If it is appropriate for the type of item, consider organizing it within a container.
- Unleash the labeler. If an item is too big to put into a container, consider giving it a frame and putting a label on the item in addition to the frame.
- Be agile. Your initial “set in order” pass will likely deliver a significant improvement – but you are also likely to overlook some potential improvements. Plan a 5S team meeting with a focus on straightening at the one and two week points, and brainstorm further improvements as part of your initial implementation.
Shine

Everyone thinks they know what housekeeping is, but it’s one of the easiest things to overlook, especially when work gets busy. The Shine stage of 5S focuses on cleaning up the work area, which means sweeping, mopping, dusting, wiping down surfaces, putting tools and materials away, etc.
In addition to basic cleaning, Shine also involves performing regular maintenance on equipment and machinery. Planning for maintenance ahead of time means businesses can catch problems and prevent breakdowns. That means less wasted time and no loss of profits related to work stoppages.
Shining the workplace might not sound exciting, but it’s important. And it shouldn’t just be left up to the janitorial staff. In 5S, everyone takes responsibility for cleaning up their workspace, ideally daily. Doing so makes people take ownership of the space, which in the long run means people will be more invested in their work and the company.
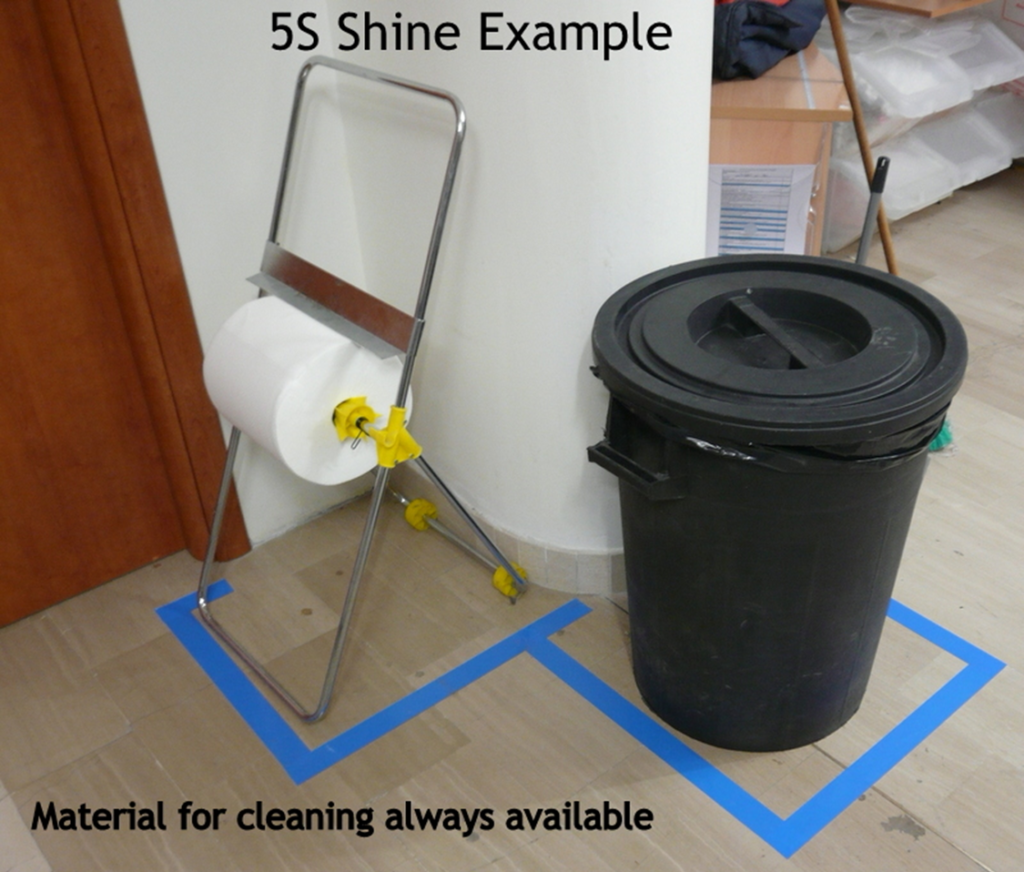
Tip: How to clean may seem obvious, but make sure people know how to properly Shine their spaces. Show employees — especially new employees — which cleaners to use, where cleaning materials are stored, and how to clean equipment, particularly if it’s equipment that could be easily damaged.
After you’ve set in order items, it’s time to elevate the work area by cleaning, inspecting, and in some cases, performing routine maintenance. We recommend the following:
- Grab the metaphorical spray bottle. Using appropriate cleaners and cleaning tools, make the work area sparkle. With every sweep, mop, brush, wipe, wash, and wax, strive to return your workspace to its former glory.
- Find the source. The guiding principle of this 5S step is “clean to understand”. If there are any signs of leaks, spills, or unexpected debris, strive to understand the source. It is likely an early warning of a future problem.
- Inspect. After cleaning each item, take a moment to look it over and examine its condition. Does it need updating, maintenance, or repair?
Standardize

Once the first three steps of 5S are completed, things should look pretty good. All the extra stuff is gone, everything is organized, spaces are cleaned, and equipment is in good working order.
The problem is, when 5S is new at a company, it’s easy to clean and get organized…and then slowly let things slide back to the way they were. Standardize makes 5S different from the typical spring-cleaning project. Standardize systematizes everything that just happened and turns one-time efforts into habits. Standardize assigns regular tasks, creates schedules, and posts instructions so these activities become routines. It makes standard operating procedures for 5S so that orderliness doesn’t fall by the wayside.
Depending on the workspace, a daily 5S checklist or a chart might be useful. A posted schedule indicating how frequently certain cleaning tasks must occur and who is responsible for them is another helpful tool.
Initially, people will probably need reminders about 5S. Small amounts of time may need to be set aside daily for 5S tasks. But over time, tasks will become routine and 5S organizing and cleaning will become a part of regular work.
Tip: Visual cues such as signs, labels, posters, floor marking tape, and tool organizers also play an important role in 5S. They can provide directions and keep items in place, in many cases without words.
It’s time to make sure all your hard work continues to pay dividends into the future. Set expectations for the future with a documented 5S process. To do so, we recommend that you:
- Document in pairs. Have one team member walk through each 5S task as another team member documents it to ensure nothing important is missed.
- Capture the essence. We are huge proponents of simplicity (and agile). Capture the essence of each task and no more. Otherwise, your documentation will be difficult to maintain.
- Prefer checklists. Checklists feel easy. Short checklists feel even easier. A great format is providing a name for each task that serves as a quick reminder and a more detailed description for training.
- Organize to simplify. Organize your checklists by role, by shift, and by frequency (daily, weekly, monthly). This will make the 5S process much less intimidating to your team.
Sustain

Once standard procedures for 5S are in place, businesses must perform the ongoing work of maintaining those procedures and updating them as necessary. Sustain refers to the process of keeping 5S running smoothly, but also of keeping everyone in the organization involved. Managers need to participate, as do employees out on the manufacturing floor, in the warehouse, or in the office. Sustain is about making 5S a long-term program, not just an event or short-term project. Ideally, 5S becomes a part of an organization’s culture. And when 5S is sustained over time, that’s when businesses will start to notice continuous positive results.
Once you’ve standardized, it’s time to continually act upon those standards. We recommend you:
- Create a schedule. Embed 5S practices as scheduled tasks (by role, shift, and frequency).
- Teach through demonstration. Instruct employees on how to conduct 5S tasks through demonstration and training. Showing employees what is expected of them will prepare them to conduct tasks on their own.
- Supervise to solo. After initial 5S training for employees, gently supervise while they continue to form habits. It is easy to make mistakes or fall off course, so patiently and helpfully offer corrections when needed.
- Adapt as necessary. When giving or receiving feedback on tasks, see where changes can be made to make the tasks easier and more efficient. Standardized work is intended to be living documentation.
Tip #1: To help sustain 5S practices, make sure all new employees (or employees who switch departments) receive training about their area’s 5S procedures.
Tip #2: Keep things interesting. Look at what other companies are doing with 5S. New ideas for organization can keep things improving and keep employees engaged.
Safety – The 6th S

Some companies like to include a sixth S in their 5S program: Safety. When safety is included, the system is often called 6S. The Safety step involves focusing on what can be done to eliminate risks in work processes by arranging things in certain ways.
This might involve setting up workstations so they’re more ergonomic, marking intersections—such as the places where forklifts and pedestrians cross paths—with signs, and labeling the storage cabinet for cleaning chemicals so people are aware of potential hazards. If the layout of the workplace or the tasks people perform are dangerous, those dangers should be reduced as much as possible. That’s what the sixth S focuses on.
Some people consider safety an outcome of performing the other five S’s appropriately, and as a result say a sixth S isn’t necessary. They think if the workspace is properly organized and cleaned and uses helpful visual safety cues, a separate safety step is unnecessary.
Neither approach to safety is right or wrong. But however a business wants to approach safety, it should be aware that paying attention to safety is important.
Tip: If mishaps and accidents do happen, stop to consider whether a 5S improvement could have prevented it. Could less clutter, cleaner walking surfaces, or better signs and labels have made a difference?
Getting Started with 5S
Even though 5S is a fairly simple concept, beginning a new 5S program can feel daunting. It’s like undertaking a big cleaning project in the garage or the basement at home; there’s a lot of stuff to deal with, and getting started probably doesn’t sound fun.
Start with practical steps such as deciding which departments and individuals will be involved, what training is needed, and what tools to use to facilitate the process. Determining these concrete things will help begin the process of 5S implementation.
Who Should Participate in 5S?
Here’s the short answer to this question: everyone. If a department is starting 5S, managers and all other employees should be included. If anyone is left out, this could lead to confusion or to messes that people don’t want to take ownership of.
It is possible that some people will play a bigger role in 5S than others, which is fine. There might be 5S coordinators who are in charge of installing and maintaining 5S labeling, keeping tracking of assigned tasks, or introducing new department members to the 5S system. These people will obviously spend a lot of time thinking about 5S compared to others. Everyone should think about 5S regularly, though. 5S might initially take place as an event, but ideally it becomes a part of daily work for everyone.
It’s also important to remember that company leaders should participate in 5S, especially if 5S is a company-wide effort. When people see their superiors taking 5S seriously by participating in it, they’ll be more likely to take it seriously, too.
5S Training
Anyone who will participate in 5S activities needs to receive training. This could be done in a classroom setting, with a training DVD, and/or through hands-on activities. A demonstration of how 5S could occur at a workstation might also be useful.
For employees to understand why the company is going to start using 5S and why it’s important, they should be given a brief history of 5S, its parts, and its benefits.
It’s quite possible that the way 5S is carried out at one organization or even one department will be different from others, so groups performing 5S for the first time may need to work out the best way to perform the steps of 5S in their spaces.
In any case, everyone should receive training when 5S is new, and then any new employees who come onboard later should receive training about 5S as well.
5S & Visual Communication
A key part of 5S is that it makes spaces cleaner and therefore easier to navigate. That means people can more easily get their work done. Visual communication tools such as labels, floor markings, cabinet and shelf markings, and shadow boards can make navigating spaces even simpler. Plus, these tools can help keep the workspace organized. A workplace that uses visual management in this way is often referred to as a visual workplace.
Some common visual tools used in 5S are:
Floor Marking Tape – These tapes can be used to outline work cells, mark the locations where equipment or materials are placed, or highlight hazards. They come in a variety of colors and patterns, and can also be used on shelves, workbenches, cabinets, and other surfaces.
Labels and Signs – These visuals use text, colors, and symbols to convey information. They can indicate the contents of drawers, call out hazards, or tell people where to store parts. Many styles and sizes exist, and some businesses even choose to make these in-house with a label and sign printer.
Shadow boards & Toolbox Foam – These visuals are helpful in workspaces with a lot of tools. Shadow boards use cutouts of tools that are placed behind the spot where a tool hangs on a pegboard. Toolbox foam works similarly, except it fits into a toolbox drawer. The tool’s shape is cut out of a top layer of foam, so a bright bottom layer of foam shows through. Both of these methods highlight missing tools and tell people exactly where tools should be placed when they’re finished using them.
Businesses may choose to use some or all of these visual tools. All of them help achieve the often-cited saying of 5S: “A place for everything, and everything in its place.” These tools make it clear where things belong, so clutter doesn’t become a problem so easily.
Tip: If you use color-coded floor markings, tapes, or other visual cues, make sure everyone understands them. Post a color chart if necessary.
7 Key Concepts to Remember
As your organization is going through the process of implementing 5S, there are 7 key concepts to keep in mind.
- Find a home for everything
- Keep 5S projects simple
- Don’t default to spending a bunch of money – be creative
- Mike it look nice
- Always be on the lookout for 5S opportunities
- Involve everyone
- Don’t forget about the Standardize and Sustain steps
10 5S Examples
Example 1: Pallet Jack Home
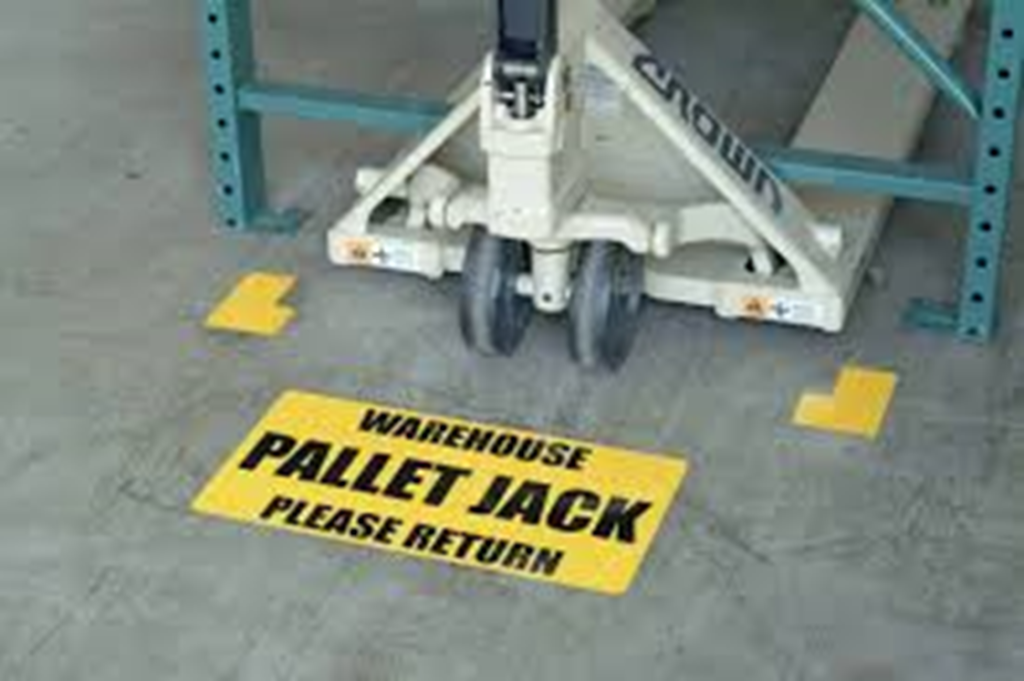
Note:
- The efficient location.
- The label of what resides there.
- Could color coat to keep track if you had multiple pallet jacks.
Example 2: Trash Station
Note:
- Make some labels as to what resides in each of the blue squares.
- Tape is laid straight with good corners.
- Trash could be on wheels to help with mobility.
- Part number labels could be posted to help with easy reordering.
Example 3: Cabinets
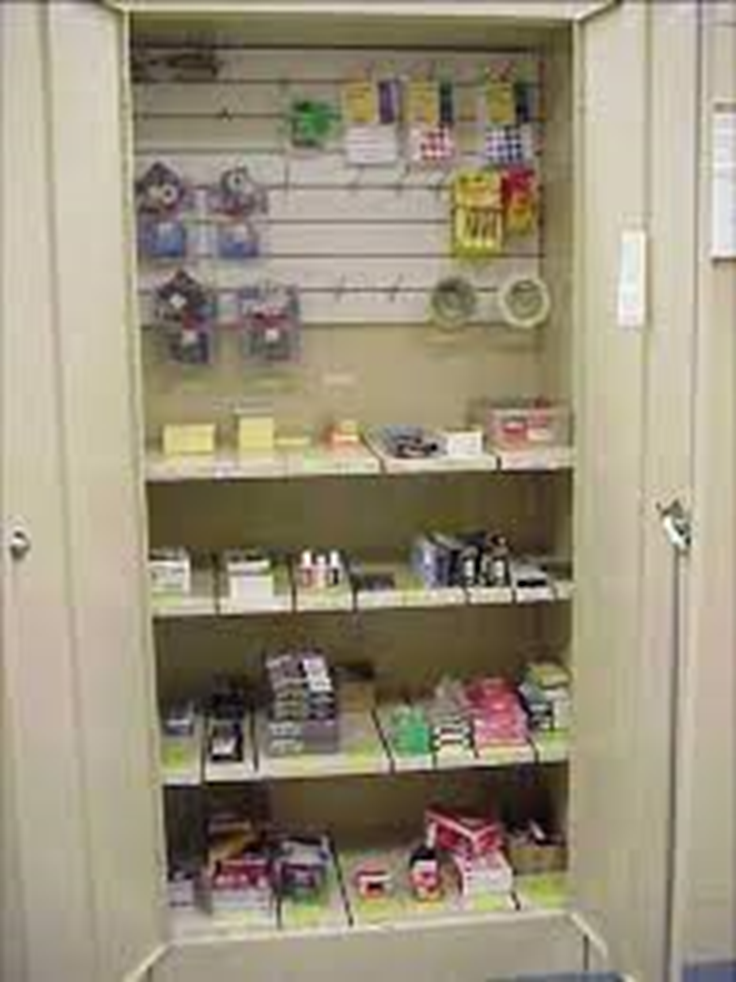
Note:
- Cabinets are hiding locations (out of sight out of mind).
- They should be labeled and sectioned off.
- Maybe use bins or hangers.
- Make a list of what resides in the cabinet.
- Label the outside of the cabinet.
Example 4: Workstation
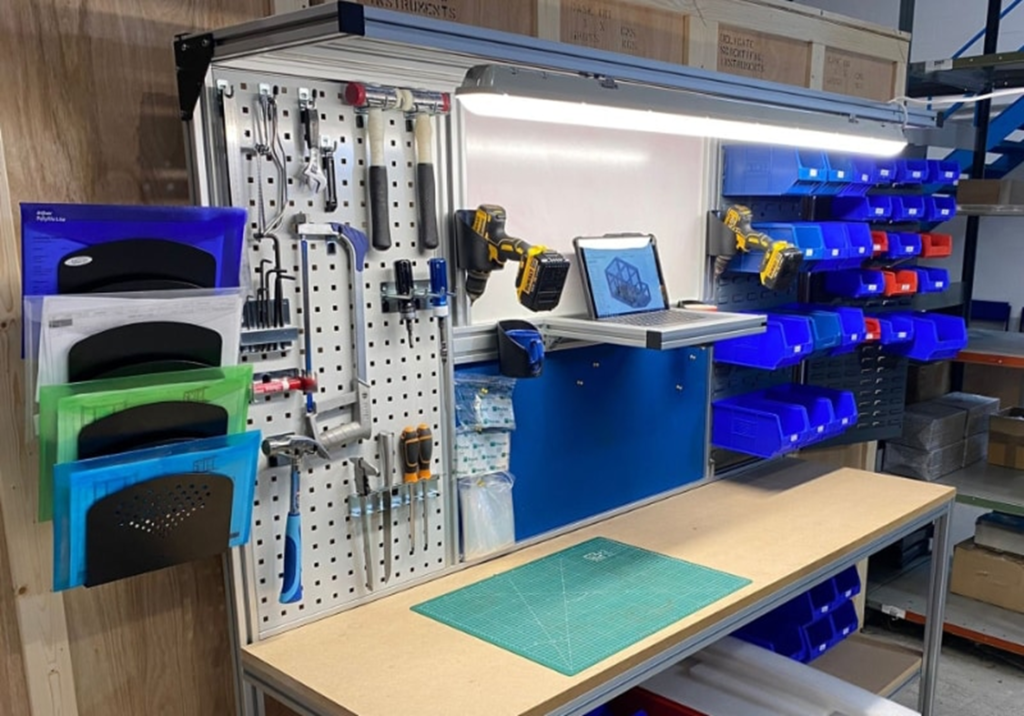
Note:
- Tools are visible and organized.
- Easy access to power and air supplies.
- Location for job folders or computer displays.
- Access to all needed material and supplies.
- Efficient use of storage under the table.
- Everything is labeled.
- Area is well lit.
- Work surface has plenty of room.
Example 5: Workstation Detail
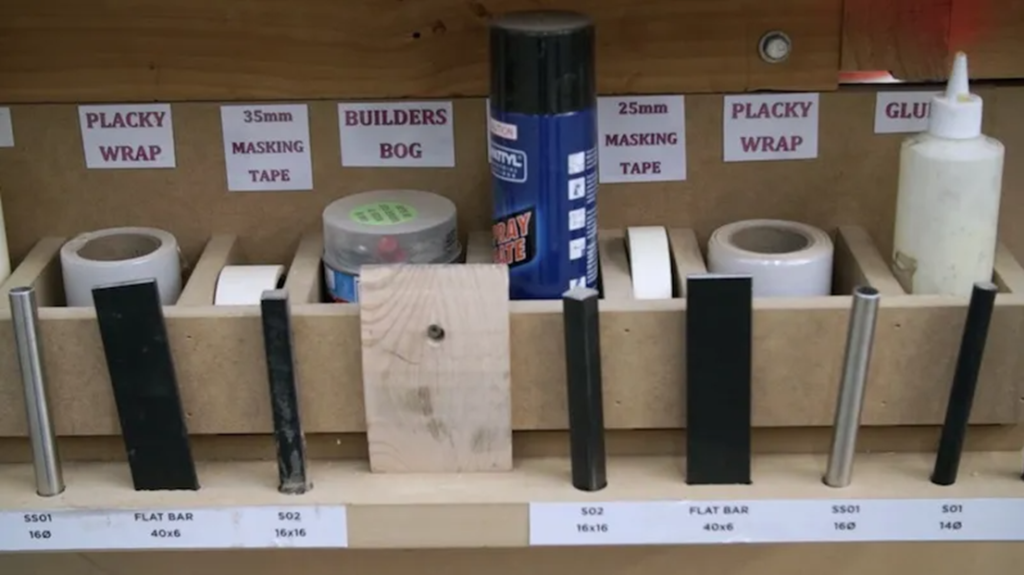
Note:
- Labels for each needed supply component.
- Each component has a home.
- Labeled part number and supplier would be beneficial.
Example 6: Support Station
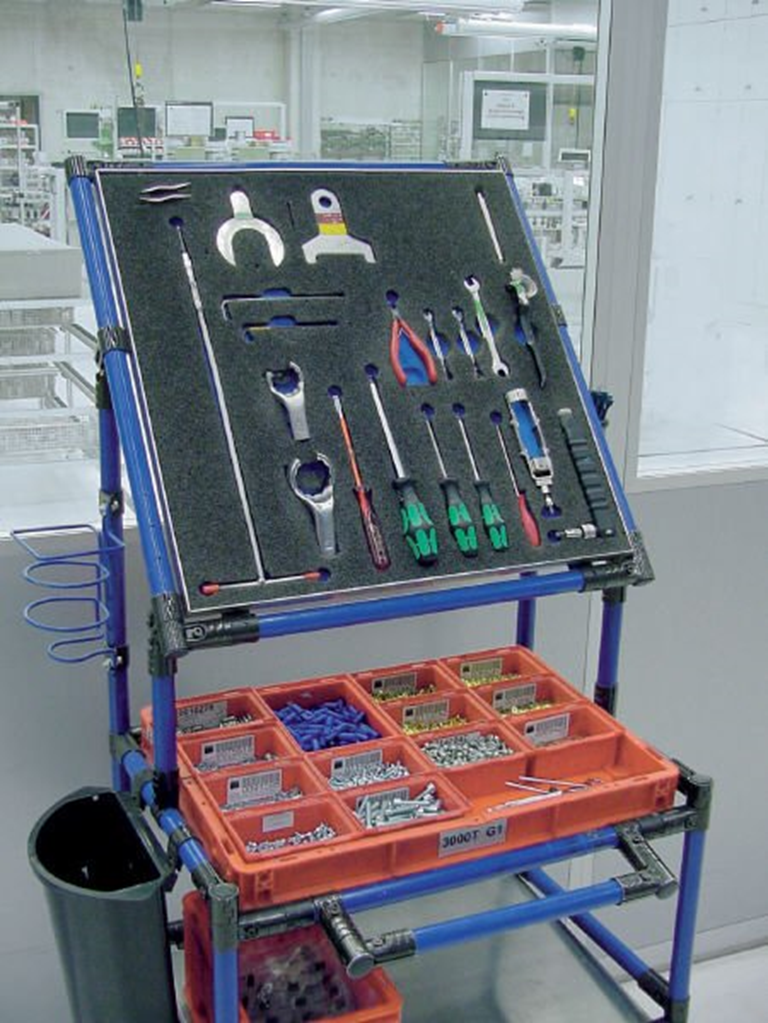
Note:
- All the tools needed at one station.
- All the fasteners needed.
- Trash is easily accessible.
- Large storage underneath.
- Fasteners are labeled.
Example 7: Kanban Cart
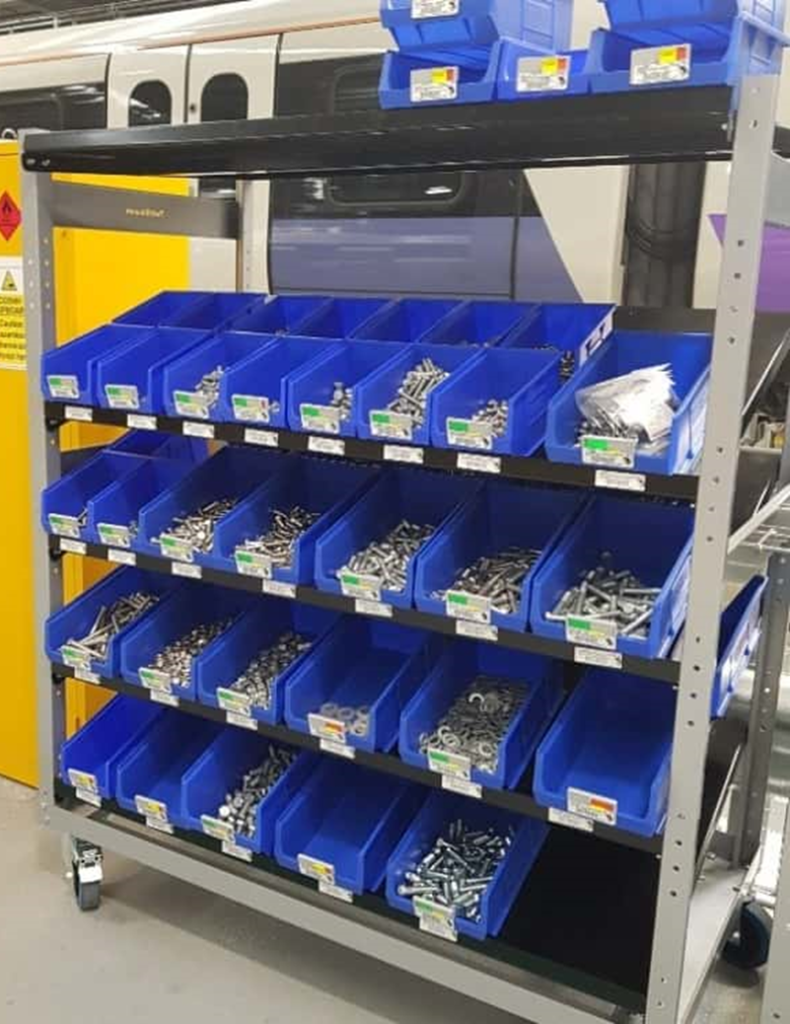
Note:
- Could be used to support a station of multiple stations.
- Good labeling with part numbers and possibly a picture.
- Have two bins so when one is being filled the other can still be used to draw from.
- Make the cart mobile.
- Ensure the cart has a clear home.
- Could be color/tape coded for a particular location.
Example 8: Drawers
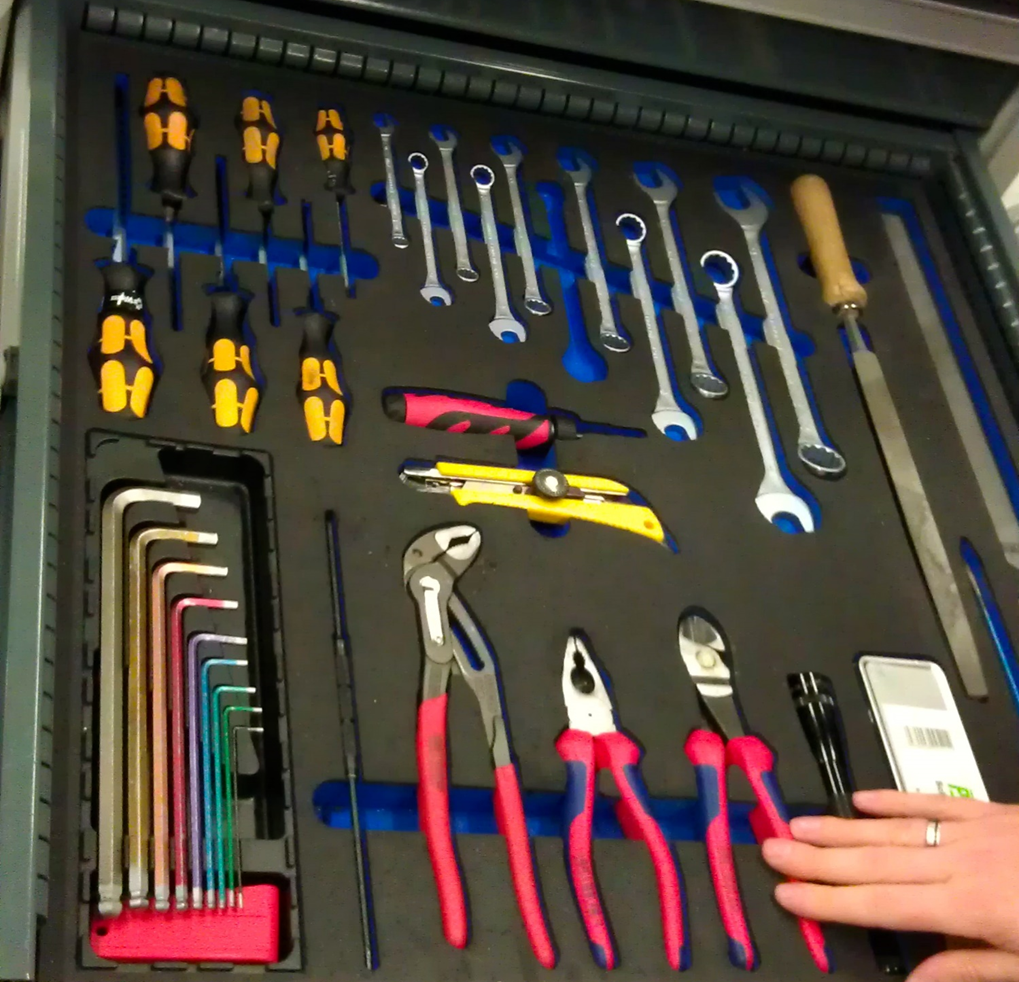
Note:
- Can easily tell when something is missing.
- Allows for only the tools needed.
Example 9: Storage
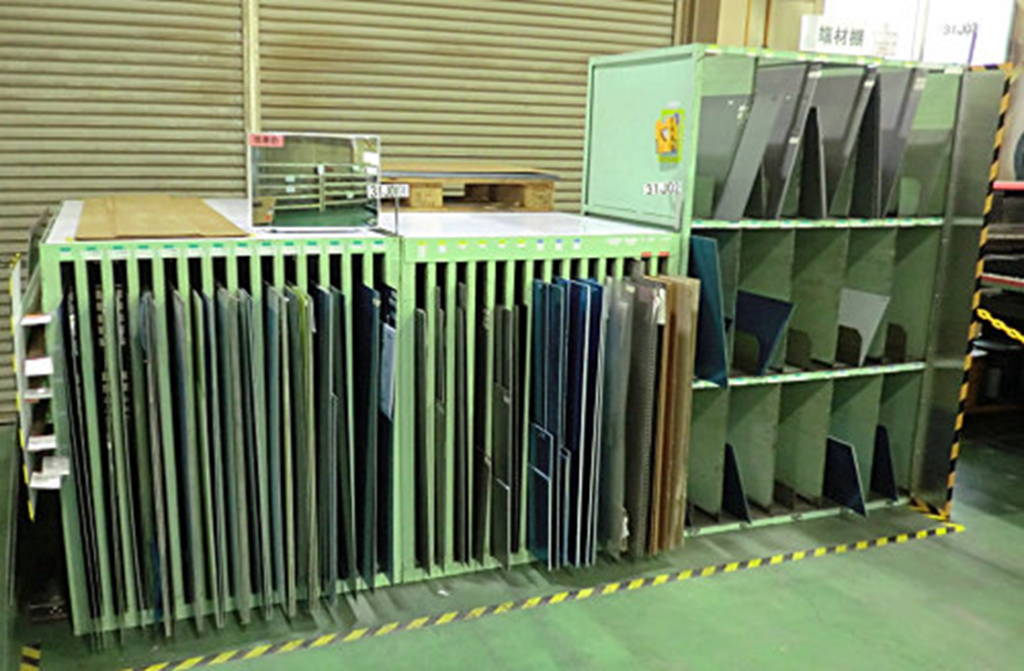
Note:
- Material identification and labeling.
- Stored effectively.
- Effective storage of scrap.
Example 10: Hanging

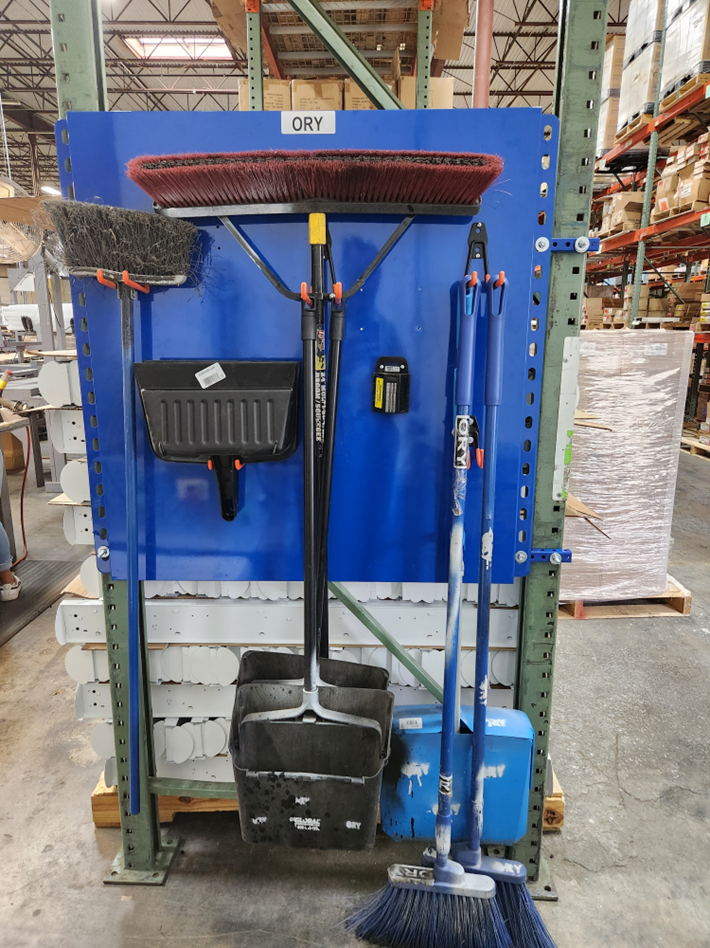
Note:
- Make tools visible.
- Helps to find a home.
- Keeps items off the floor.
Looking at the examples above you can see that spaces are uncluttered and less confusing. After 5S, everything has an assigned place, which is often marked with floor marking tape, labels, and other visual cues. When 5S is used in the workplace, it’s easier to detect abnormalities and spot potential problems before they grow into significant issues.
In Summary
5S originated in the manufacturing industry at Toyota and it has proven useful for manufacturers in many industries, not just the automobile industry. In recent decades, 5S has moved beyond manufacturing to other industries such as healthcare. Many offices also employ 5S, as do some schools and other government organizations.
The basic steps of 5S can be applied to any workplace. An office can use 5S to keep supplies organized, as can hospitals and medical clinics. 5S can even be used in a communal kitchen to keep the fridge from filling up with expired food. It’s really just a matter of determining what workspaces and work processes will benefit most from improved workplace organization.
Business leaders considering using 5S may wonder if 5S is expensive to implement. Generally, it’s not. There may be an up-front investment in tools like floor marking tape and labels, and some time does need to be spent on training and on 5S activities, which takes up employees’ time. In the long run, though, 5S makes processes run more smoothly and prevents mishaps, and those things usually save businesses money.
If your organization is planning to embark on the Lean journey, then 5S is one of the foundational concepts that should be put in place first so as to support a successful Lean program.