I have stated in a few of my previous blogs that a particular section was challenging or hard. At this point I am retracting all of those statements and am now claiming this section of the trailer to be the most challenging. There are two reasons why I am changing my previous declarations. The first one is getting the skin mounted and the second one is building and mounting the galley door.
So in my previous two trailer blogs we had finished the trailer frame and then we completed the electrical box, running all the wiring. Now that the wiring has been run, we can skin the trailer and install all the doors.
We started by applying ⅛” plywood on the frame. Sides first then the front and top. The difficult part was applying the plywood to the front rounded area. The plywood wound up not working and we had to instead use an ⅛” Formica board that we could wet down, bend, and strap to hold a rounded shape. By the way, the boxes you see drawn on the Formica were areas we needed to stay away from as we stapled down the material because that is where the wire ran through the framework to get to the electrical box.
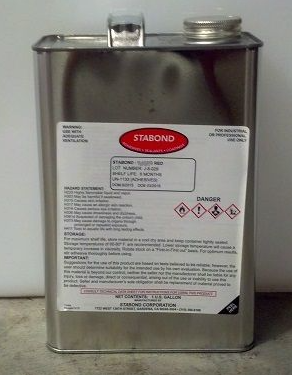
Once the plywood was mounted, the filon was the next material to apply. Filon is a fiberglass type material that is used for RV’s and trailers. It holds up well to the elements. But the big question was how to adhere it to the plywood surface. I did a lot of research and found a material called Stabond T-440. This “Contact Cement” is somewhat toxic and most of the articles I read said that when it’s adhered, it is adhered for good. I reluctantly purchased 2 gallons of the contact cement at a whopping $340 a gallon (I purchased 2 gallons). I purchased the adhesive from a company called All-Rite.
As I mentioned above, adhering to the filon was one one the biggest challenges on this whole project. So, let me give an explanation of how this went down. The Stabond had to be applied to both surfaces – the plywood and the filon. Then you waited until the surfaces were tacky then you simply put the material on the matting surface. Wala, all done. Not that simple. First, how do you take a 10ft by 6ft sheet of filon and simply stand it up and place it on the sides of the trailer. Because what we found out was that Stabond gets tacky quickly and once the two tacky sides touch, it is STUCK TOGETHER. Also how do you avoid wrinkles?
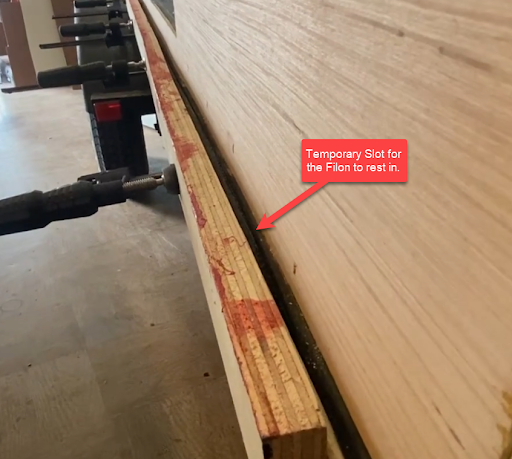
So here is what we did. For the sides we created a temporary slot at the bottom of the trailer for the filon to rest in once the Stabond was applied to both surfaces. By the way, applying the Stabond had to be done very quickly so that it did not dry before the side was covered. And also, we could not use regular rollers because the adhesive eats through the roller and it would just come off its roller core. And one more thing, the Stabond would turn into an almost cotton candy consistency which made it messy to work with. You did not want to get this stuff on you. Anyway, we would then set the filon in the temporary slot and quickly but meticulously work the filon into place by rolling it upwards insuring that we did not leave any wrinkles. We actually used a rolling pen.
It took three of us to complete this task. Two to hold each end and one to roll the filon. By the way, we did goof one side. We had a miscommunication and stuck the material before we were aligned. We had to rip it off (violently) and do it again. Very expensive mistake.
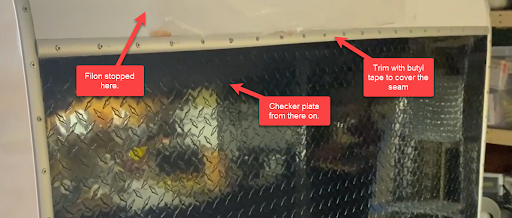
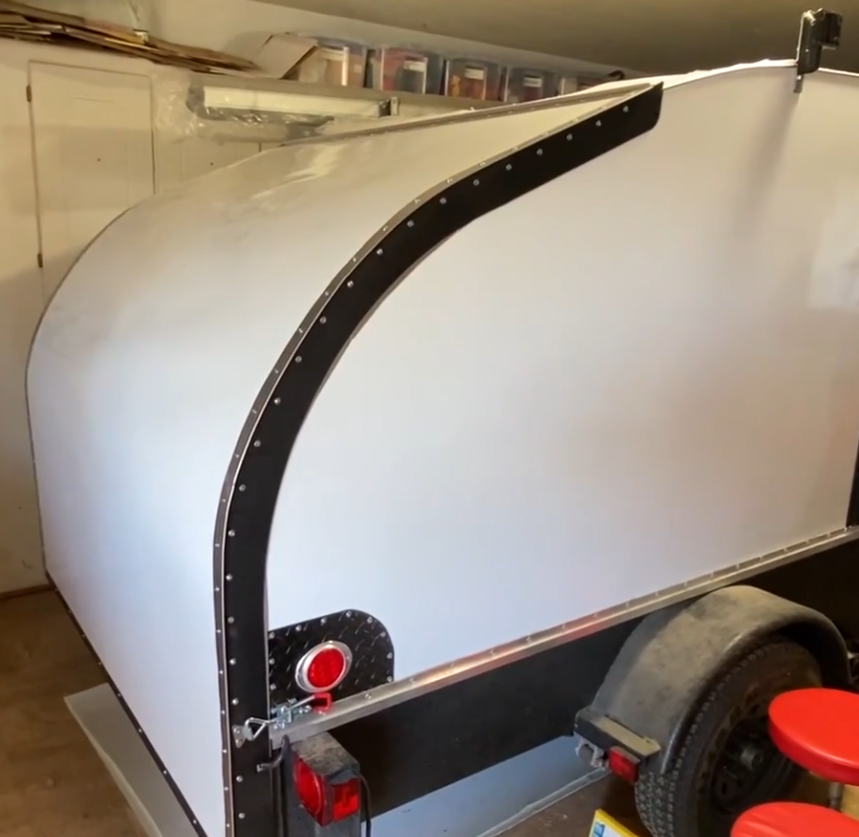
We finally finished both sides and now it was time to cover the top with filon. Because we were working in a garage with an eight-foot ceiling, this was a challenge because we did not have much clearance to work with. Luckily with the design I was going with, my piece did not have to go from the galley door hinge to the front of the trailer. The piece of filon stopped right after the radius. The checker plate went from the radius down to the trailer ledge.
The approach we took for installing the filon on the top was that we painted the Stabond on a beginning section at the galley door, clamped it, painted another section, and slowly kept rolling it on until we got to where we needed to be at the front. We then used a rotor with an edge bit to trim off all the excess filon. It worked very well but we quickly learned that you should cover your arms and face so as to not get the filon dust all over you because it is fiberglass and it does itch.
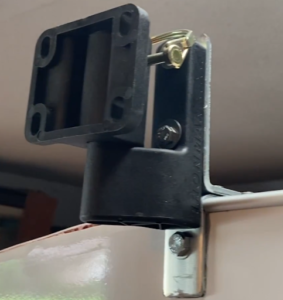
After the filon was adhered to the sides and top and the checker plate was placed on the front, we installed two sets of brackets on both sides of the trailer. These brackets are used to support the Ironman 4×4 canopy that I wanted on each side. The brakes support two quick release supports that mount to the canopy allowing for canopy removal.
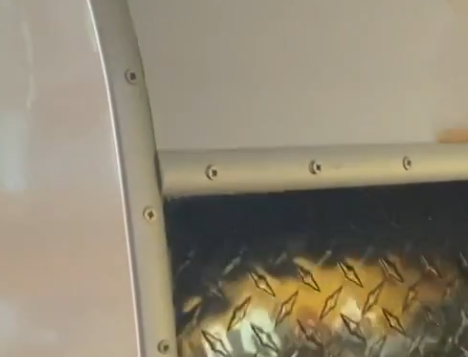
Once these brackets were in place, we were then free to install all the trim on the main part of the trailer. This included the bottom trailer edge trim, the side trim and the front seam trim. We used screws about every 6” and filled the inside of the trim with butyl tape.
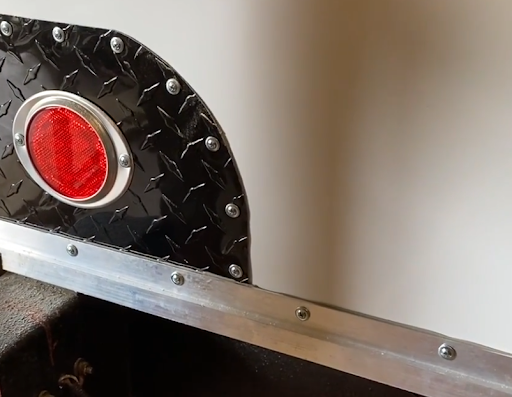
Before moving on to the galley door, we also mounted the two outdoor lights that mounted above the side doors. And we cut the opening for the roof vent and mounted it.
Now with the main trailer items complete, it was time to start on the galley door. As I mentioned above, the galley door was the next challenging part of the trailer build.
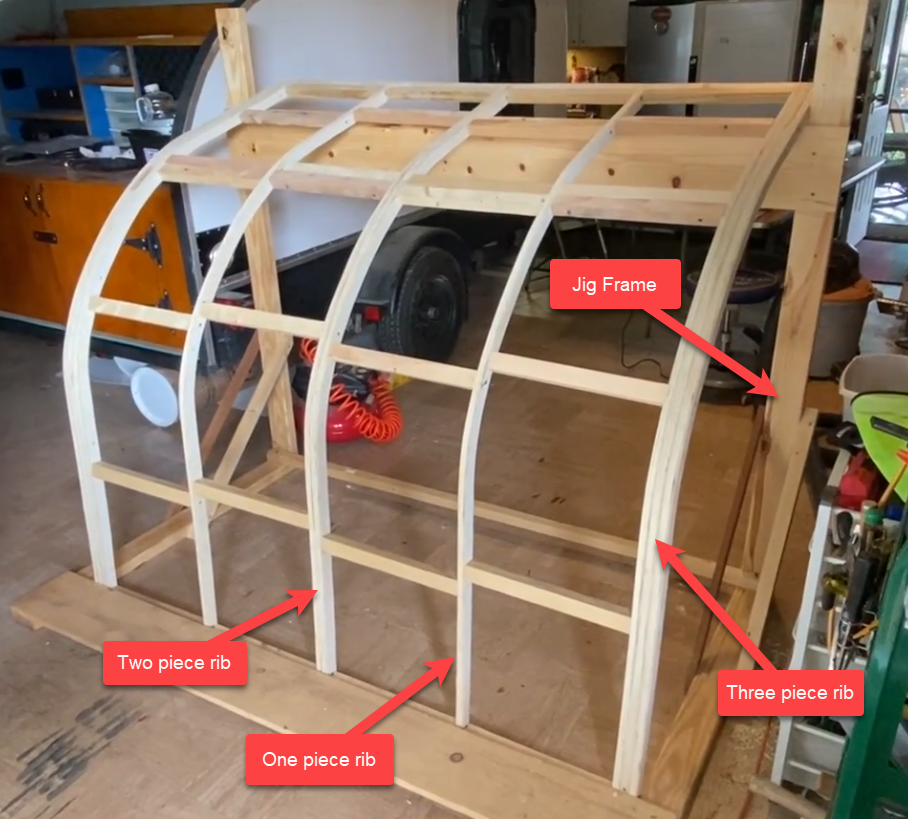
We started by making a jig to help build the frame and to be able to build the frame at floor level. This jig helped us tremendously because it kept the frame straight and square.
We made a template of the back door radius on the trailer itself and used to cut out ten radiused pieces. Three of which were sandwiched together to make the ends. Two were sandwiched together for the middle. And then single pieces that split the difference. These ribs were then linked together by staggered cross pieces.
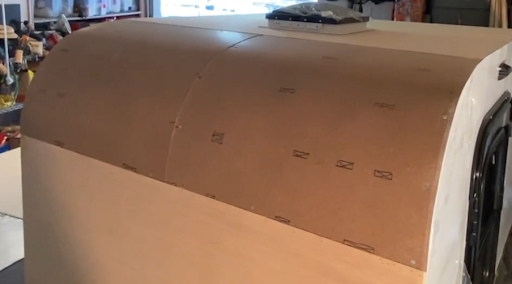
Once the galley door frame was assembled, we skinned it with the ⅛” plywood and set it into place to ensure it fit properly. Knowing that we were going to have a gasket along the edges, it was a close enough fit.
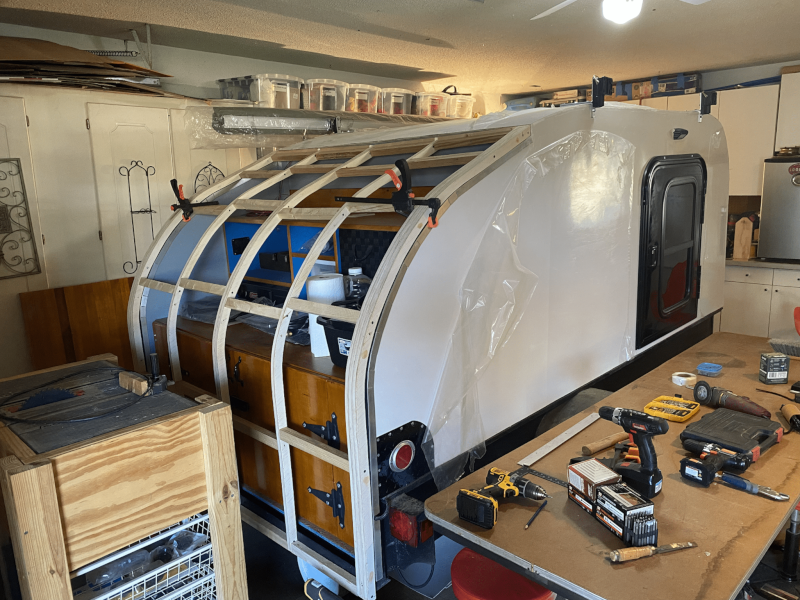
Here it is with the plywood mounted to the frame.

We trimmed off the edges and mounted the filon material, trimming it in the same fashion. Next we mounted what’s called a hurricane hinge. This hinge runs across the top of the trailer and has a sealed system allowing for the support of the full galley door. We mounted one side of the hinge to the trailer and the other side of the hinge to the door then slid the door into place.
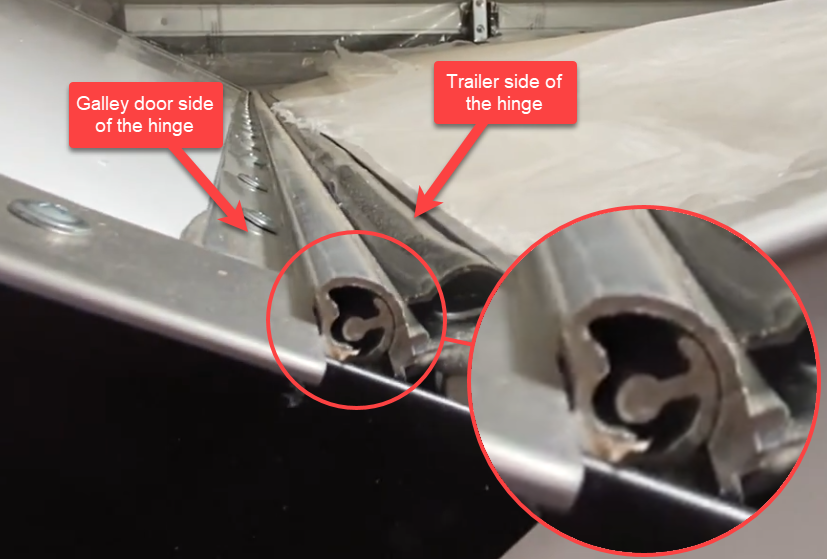
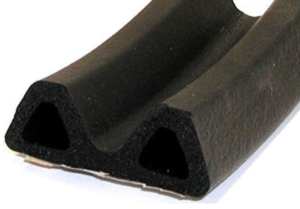
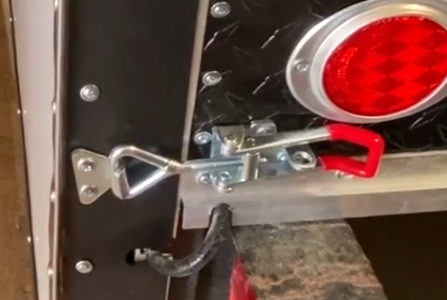
Once the galley door was mounted, we then mounted a side flange to help with sealing and more trim material to finish it off. We ran a wide double bumped gasket down each side and across the bottom. We then mounted a camp on either side so that the door could be pulled shut and locked.
With the galley door in place the challenging parts are behind us. We have some minor tasks to get done but for the most part the trailer is very close to being complete. We are currently mounting LED lights in the inside of the galley door, we are going to try to install struts to help hold open the door. We are going to lacquer the inside of the galley door. We need to touch up the paint on the inside of the trailer and on the bottom of the trailer. I am going to mount some netting to hold items in place as I travel with the trailer. I need to strap a few things down such as the propane canisters. I am working on a way to mount the spare tire to the front of the trailer. And I might try and mount some fancy underneath running lights to give it a cool factor. We will see.
I plan to do one more video and blog showcasing the finished product. Hopefully it will be coming very soon.