The electrical was the most challenging part of this build so far. The main reason being that neither myself or my dad has any electrical experience. So, we did a lot of research. There does happen to be an enormous amount of information on the internet regarding wiring of trailers, campers, and vans. With this research, we were able to piece together a plan. One of the best diagrams we found is shown below. This particular diagram is for wiring a van but a lot of it was transferable to our camper.
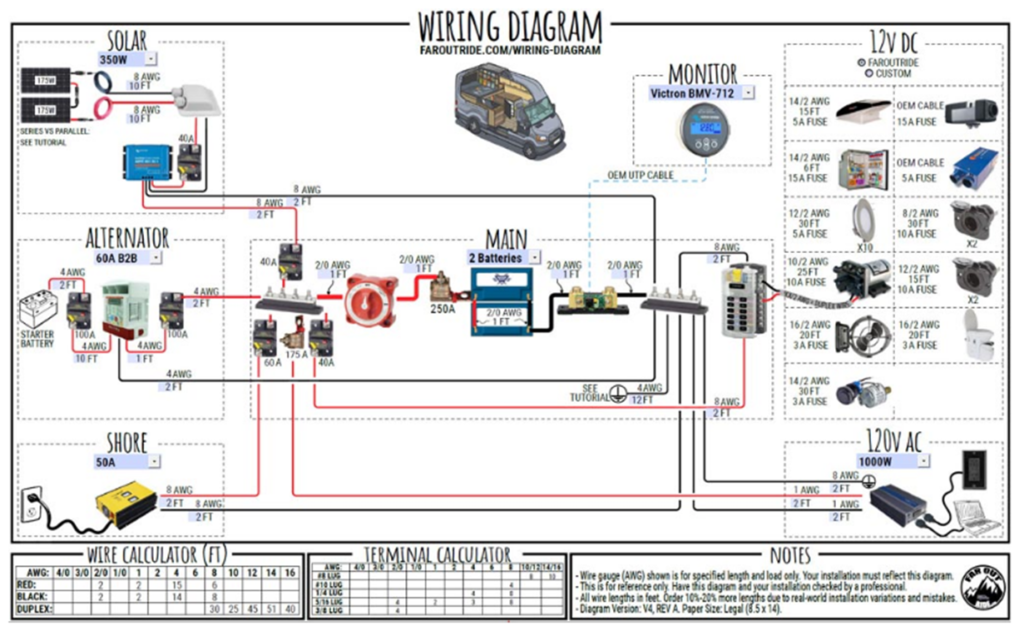
In our build there were several things that we did not require. First, we did not put in a solar power system. We felt that shore power was enough and I did not want to mount panels on my roof because that would be a potential leak point. Also we did not put a large amount of 12v items in the camper.
But to be clear, we do have 120v plugins in the truck, also in the sleeping area, and in the galley area but all of this is fed directly from a shore power connection (when turned on).
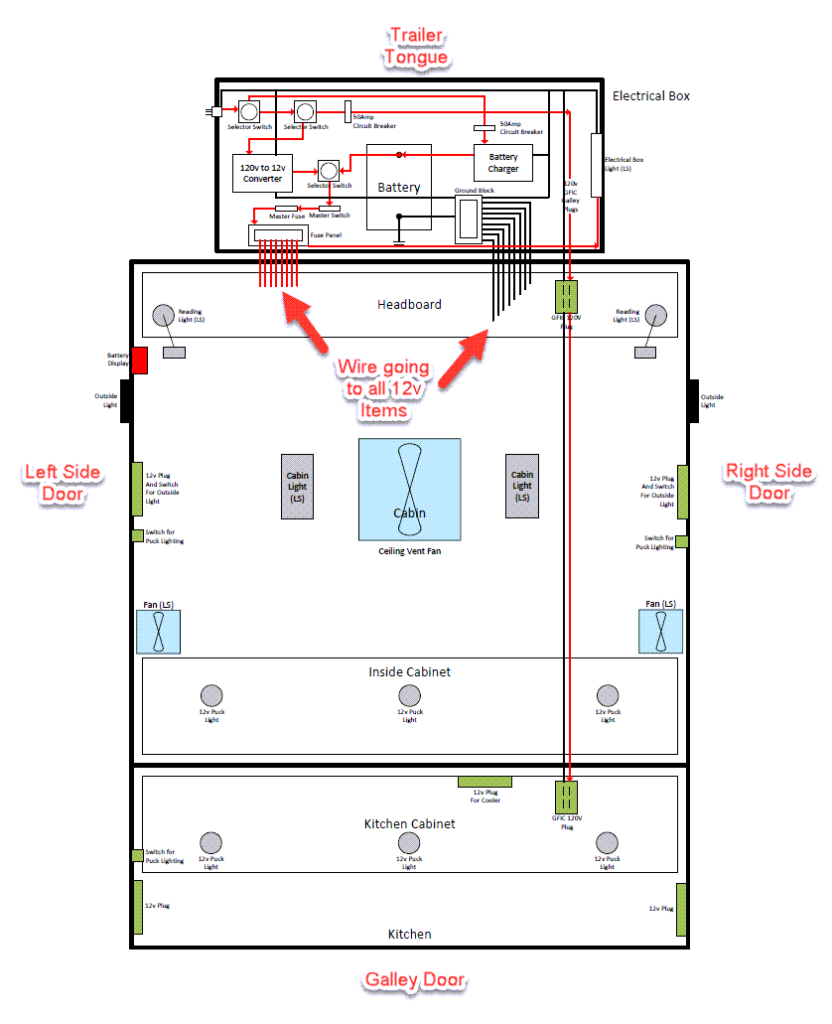
So after a lot of testing and trial/error, we finally came up with a design we believe worked for our trailer layout and our design requirements. Below is the layout of our system.
Once we had the wiring all sketched up and we felt comfortable with the plan, there were three main actions that we had to do. The first one was, run all the red and black wire throughout the trailer before the skin was put on. Second, we needed to mount all the items that needed to be wired (including items that we had to mount after the skin was installed). Third, we needed to mount all the electrical components that were going into the storage box that was mounted on the tongue of the trailer.
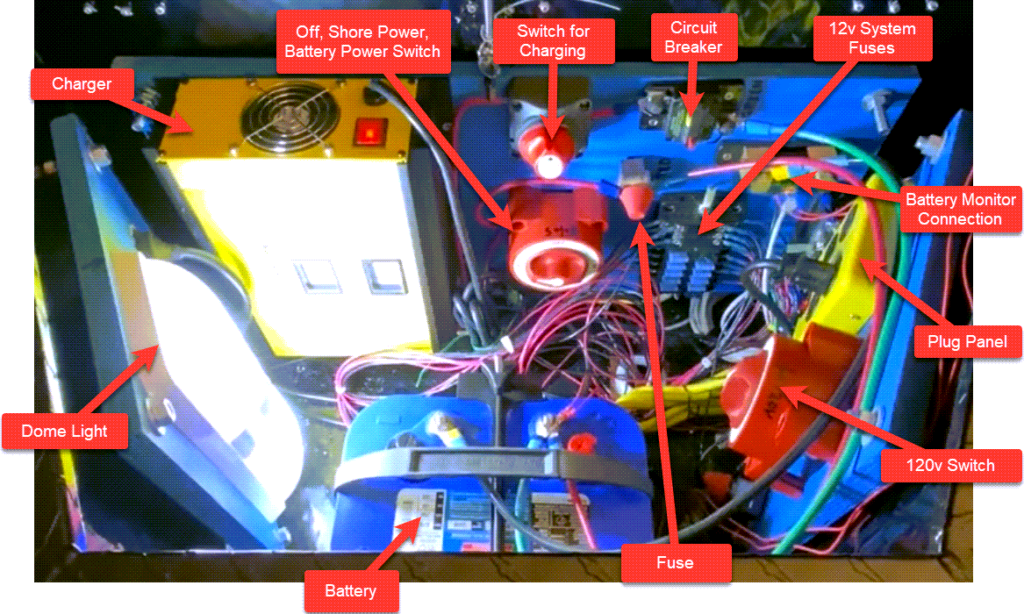
Mounting the components into the storage box in the front of the trailer was the most challenging part of the electrical. We mounted all the components on ¾” plywood boards and stood them off from the storage box wall so that we could run wires behind the boards. I also added some absorption springs to the boards so that while driving the bouncing could be somewhat absorbed.
The below picture shows all the components and how they were arranged. It is tight but everything can be accessed relatively easily.
Once the components were in, the wiring needed to be completed. The wires were then run from each component to the front of the trailer, down to the bottom of the trailer, then traverse from the trailer to the storage box through some PVC, and come up into the box. The wires were then terminated to the fuse block.
We tested each connection to insure they worked correctly before any of the wiring was covered.
One of the features of this wiring setup is that we can run all of the 12v on either battery power or shore power. I have an indicator inside the trailer that shows me how much battery power I have left before I have to plug into shore power to recharge the battery. The 120v plugs only work on shore power.
The video below shows all the components in place and working.
With the wiring complete, the next video will be skinning the trailer, installing all the side doors and installing the galley doors.